# Hotel / Guest Access
# What is Hotel / Guest Access?
The 'Hotel / Guest Access' (Guest Access) Application, allows the simple creation of guest users with a limited feature set.
Guest users, for example Hotel Room are extensions created with restricted set of features.
A guest user cannot make or receive external calls directly, or be listed as a Next Activity destination or member of a call queue or ring group.
Guest users can however call other users on the system as well a virtual extensions.
Each gest user will be provisioned with the same set of line keys (eg: 'Reception', 'Gym', 'Room Service', etc).
Use Cases:
- This type of user is perfect for use in a Hotel Room, where you want to configure a large group of users rapidly.
- School classrooms.
- VoIP Cameras.
- Doorbells & Gate Systems.
# Enable the Application
The first step is to enable the 'Hotel/Guest Access' application for the PBX.
From the PBX Configuration screen, click ‘Manage Applications’. ![]()

Once you have enabled the feature, you will see there is new icon for 'Hotel/Guest Access' visible under the 'Active Applications' heading on the configuration page of the PBX.
# Configure Guest Access
Before you can start adding Guest Users, you must first configure the default settings for your Guest Office.
From the PBX homepage, click the 'Hotel/Guest Access' icon. 
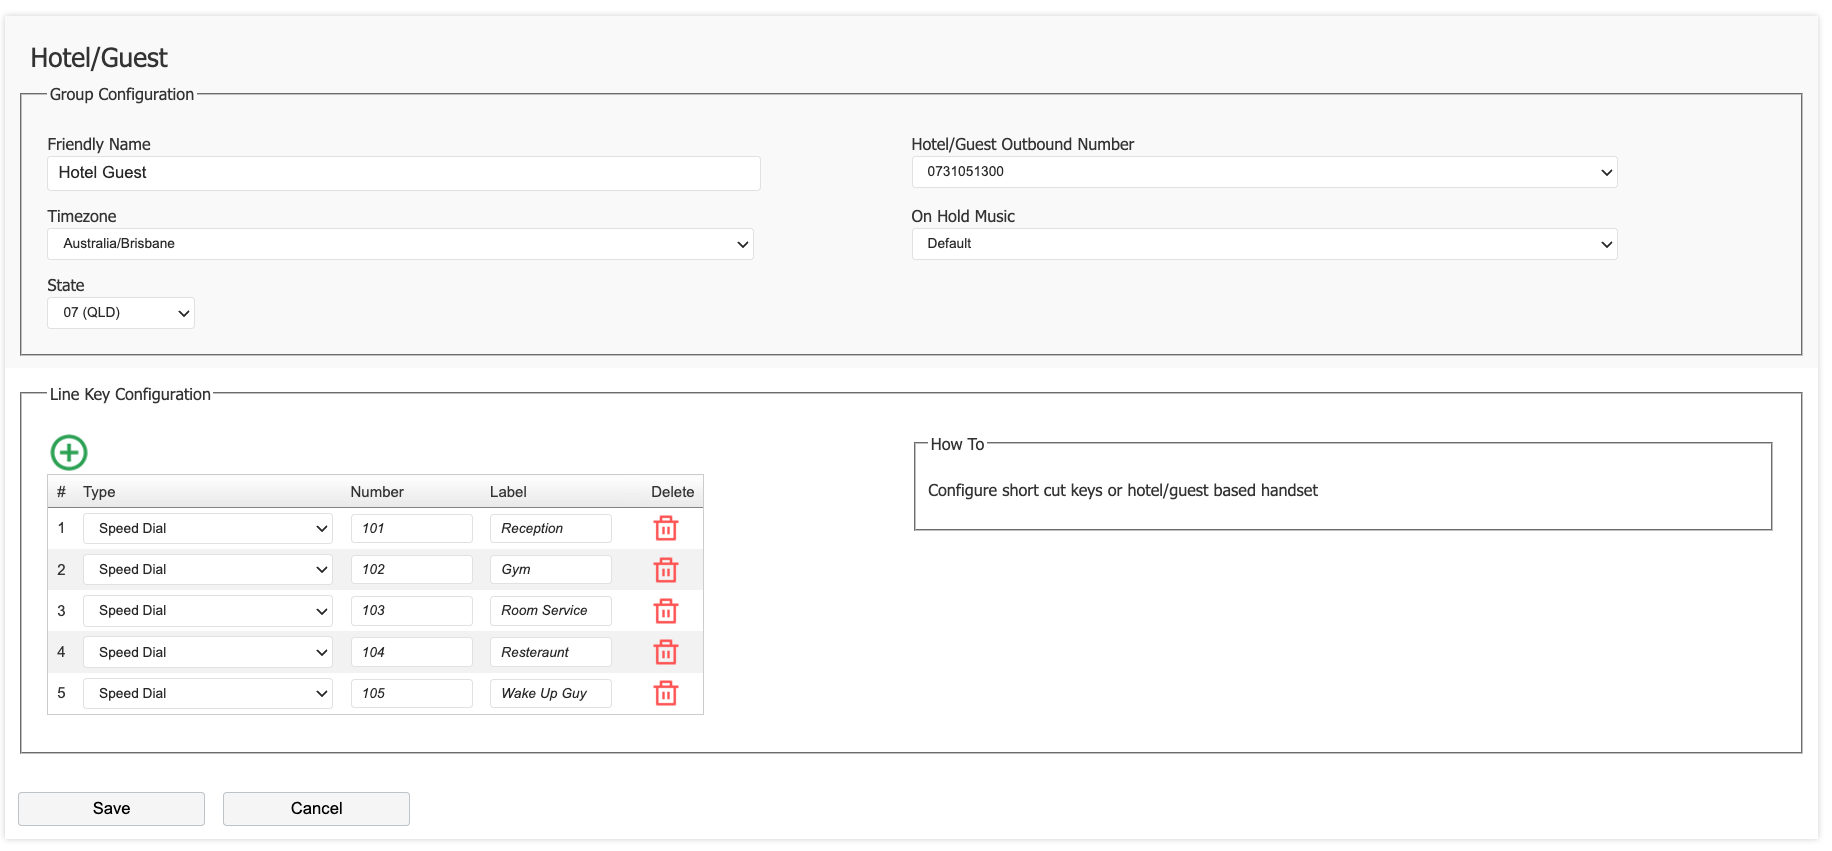
On this page you must first set the following items:
Friendly Name: This is for your reference, and will be visible on the 'Offices & Users' page to differentiate from a standard office.
Timezone: The timezone for the guest users.
State: The state the guest users will be located.
Hotel/Guest Outbound Number: This is the outbound Caller ID that be used if a guest user makes an outbound, external call.
On Hold Music: This is the music on hold stream that will play if a guest user puts a caller on hold.
Click 'Save' when finished.
# Configure Guest Users
To configure a Guest User, select 'Offices & Users' from the PBX Configuration screen. 

Click on the '+' icon to add a new user, or select an existing extension if to modify.
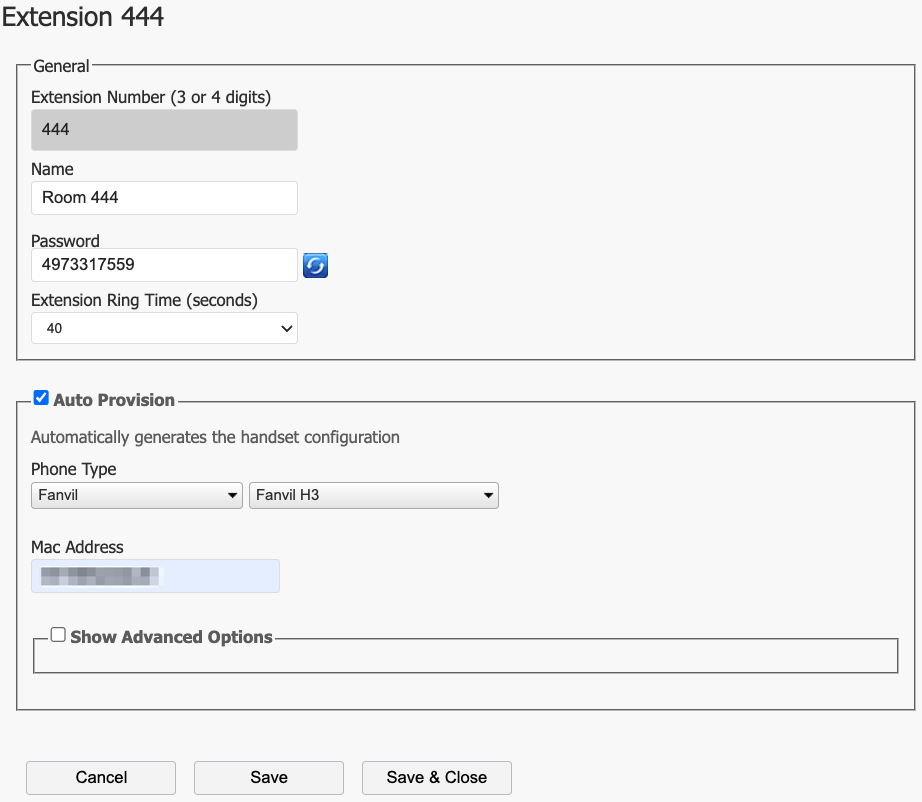
Enter the following information:
Extension Number: Specify the extension number. (Tip: In a hotel scenario, you might consider matching the room number).
Name: The name that will show in on other phones when called from this extension.
Password: The system will auto-generate a password for the phone, or you can specify one here.
Extension Ring Time: The time (in seconds) that the phone will ring for when dialled.
Select 'Auto Provision'.
Select your phones make and model from the list of available devices.
Enter the MAC Address of the phone when prompted.
Click ‘Save & Close’ when finished.
Your changes are now ready to be applied to the PBX.

Click ‘Apply Changes’.

← Helpdesk Integrations →