# Device Configuration
This page contains ad-hoc device configuration information.
# Grandstream HT802
# Logging into the HT802s management portal
- Plug an analog phone into the FX1 Port
- Dial *** (triple star).
- Select option 02 at the prompt.
The devices IP Address will be now read back to you.
Enter the IP Address into your web browser.
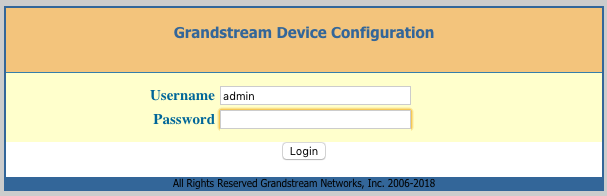
If this is a new HT802, Grandstream set the default credentials to:
- Username: admin
- Password: admin
Click 'Login‘
# Security Settings
# Reset Admin, User, and Viewer passwords.
Click on the 'Basic‘ tab.

It is strongly recommended that you reset the above passwords immediately.
Click on the 'Admin‘ tab.

It is strongly recommended that you reset the above password immediately.
::: Warning Not resetting the above passwords can lead to toll fraud and very high bills. :::
# Disable HTTP access
Click on the 'Basic' tab.
- Set 'Web Access Mode‘ to HTTPS only.
- Set 'Disable SSH' to 'Yes'.
# Network Settings
Click on the 'Basic‘ tab.
You can configure your needed network settings on this page.
Click 'Apply‘ when finished.
You will need to reboot the device for your changes to apply correctly.
# SIP Configuration
Click on the 'FXS PORT1’ tab.
- Set ‘Account Active’ to 'Yes‘.
- Set 'Primary SIP Server’ to the PBX domain. (EG: pinetree.mycloudpbx.com.au)
- Set 'SIP Transport‘ to 'TCP’.
- Set 'NAT Traversal‘ to 'Keep-Alive’.
- Set 'SIP User ID‘ to the ’Extension Number’.
- Set 'Authenticate ID‘ to the 'Extension Number’.
- Set 'Authenticate Password‘ to the 'Extension Password’.
- Set 'Register Expiration‘ to '1’. (minutes)
- Set 'Reregister before Expiration‘ to '15’. (seconds)
- Set 'Enable SIP OPTIONS Keep Alive‘ to 'YES’.
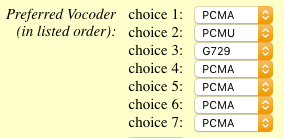
- Set the ’'Preferred Vocoder‘ order as follows.
# Factory Resetting the device
Plug in and power on the ATA.
Locate the indented 'RESET' button between the power and ethernet port on the rear of the device.
Use a paper clip to press and hold the reset button for 10 seconds. Do not release the button until all 4 lights on the top of the ATA flash for 1-2 seconds.
TIP
The ATA may reboot several times before the factory reset is completed.