# Integrations
Integrations allow administrators to capture changes and events actioned via the myCloudPBX customer portal or a PBX.
Using the webhook, external workflows can be called, for example when your client creates a new myCloudPBX extension, creating a callback request inside your CRM for an account manager to complete a wellness check.
A Webhook is a way for 2 applications to communicate and share real-time data. A Webhook works in the same way as an API only in reverse - data is pushed from the application rather than pulled (API).
myCloudPBX Integrations can also be used to provide live data feeds to third-party or external billing systems.
There are two main types of Integrations that can be enabled.
- myCloudPBX Integrations: These integrations are specific to an account.
- Service Integrations: This integration is specific to one PBX.
# myCloudPBX Integrations
myCloudPBX Integrations include the following:
- Create User
- Delete User
- Modify User
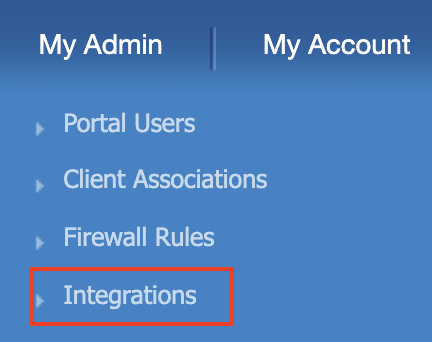
From the 'My Admin' menu, select 'Integrations'.
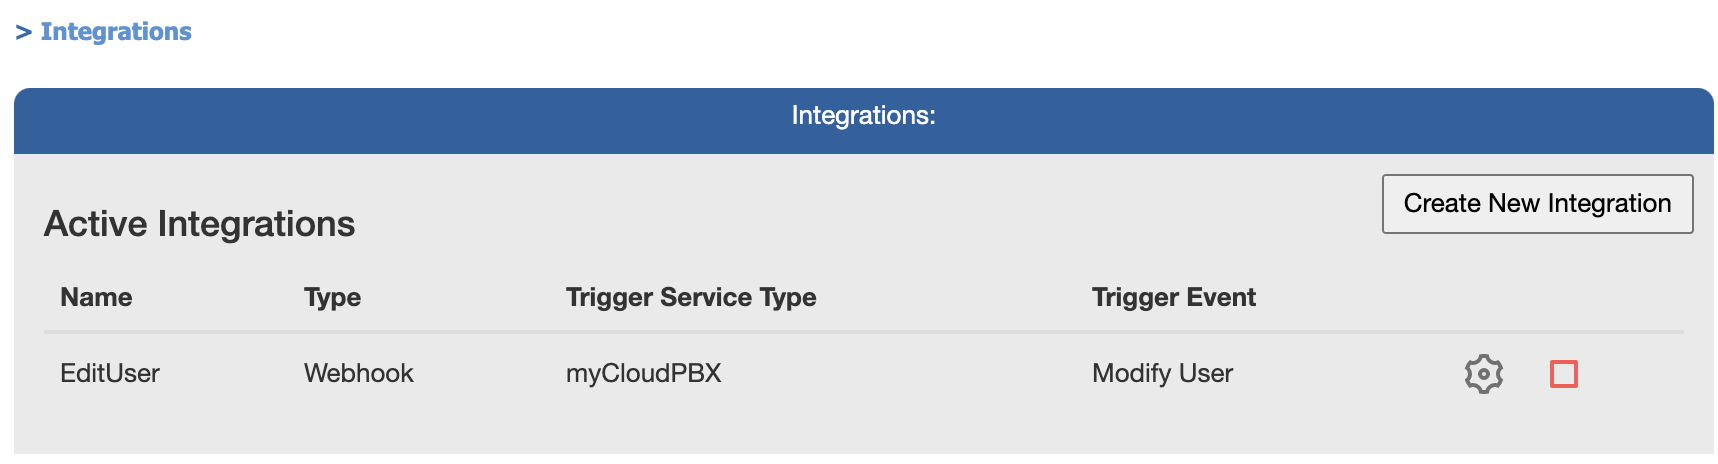
On this page, you can see all of your active integrations.
- Name: This name is for your reference.
- Type: This is the type of Integration, currently Webhook only.
- Trigger Service Type: This is the trigger, currently myCloudPBX only.
- Trigger Event: Create User, Delete User, etc.
Click the  icon to edit an Integration.
Click the  icon to disable an Integration.
Click the  icon to enable an Integration.
# myCloudPBX Integration Configuration
To create a new Integration, click 'Create New Integration'.
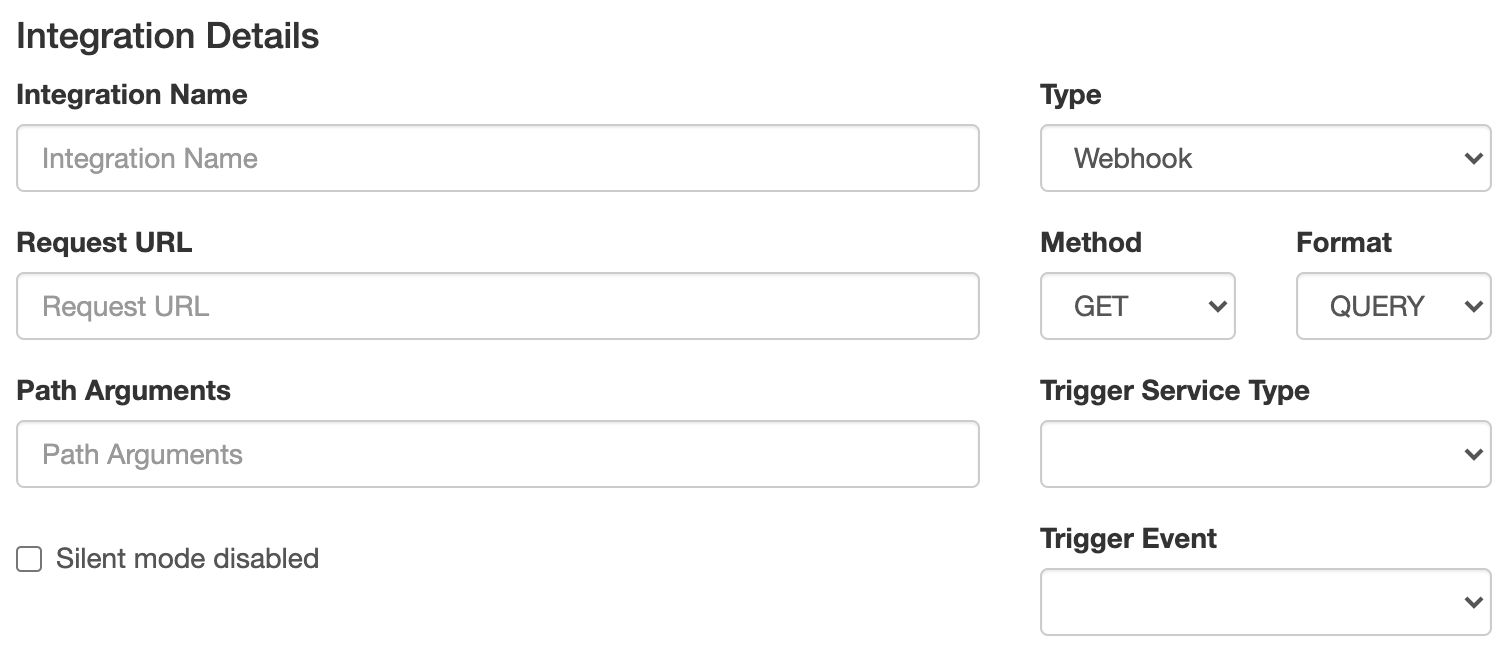
Enter the following information:
- Integration Name: This is for your reference
- Type: Webhook
- Request URL: The URL the payload will be sent to.
- Method: POST | GET. Most endpoints will use POST. GET support for legacy applications.
- Format: JSON | QUERY. JSON payload or QUERY string.
- Path Arguments: Additional path arguments.
- Trigger Service Type: Service type.
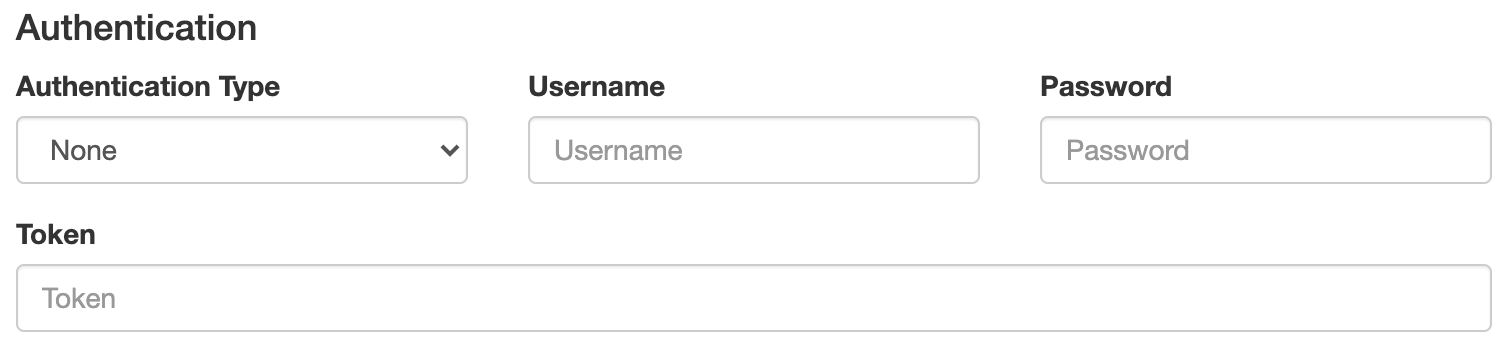
Enter the following information:
- Authentication Type: None | Basic Auth | Token.
- Username: Username [optional]
- Password: Password [optional]
- Token: Token [optional]
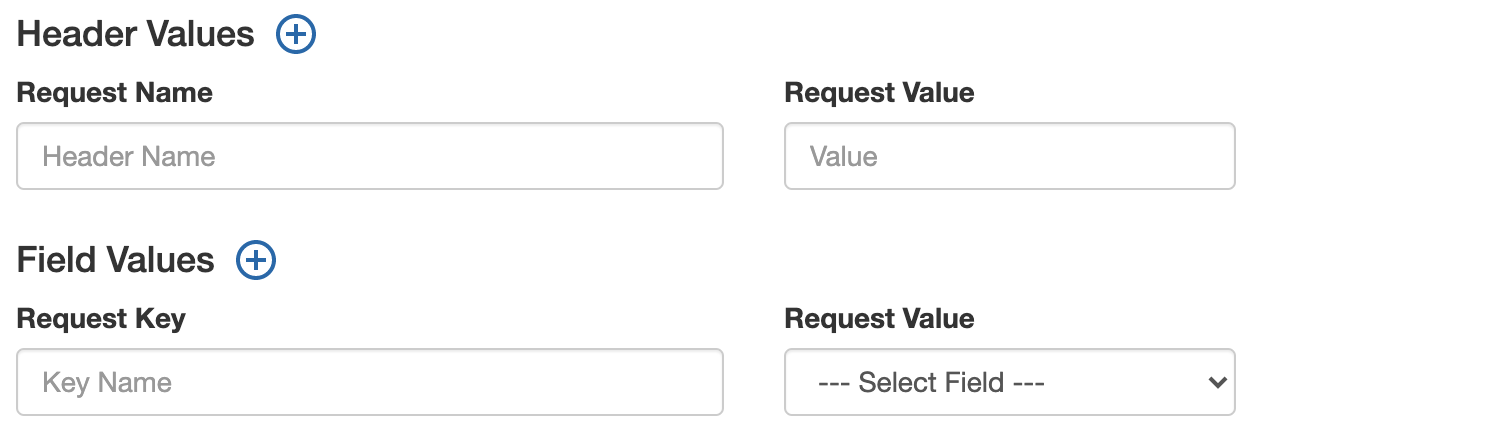
A custom HTTP header can be added to requests, a typical request will start with X-, for example X-{myvalue}.
Enter the following information:
- Request Name: Name of the custom header value.
- Request Value: Value to be sent.
Field Values
The payload can be customized by selecting a predetermined value from the drop down list. In all cases the Request Key can be configured to align with your application. The following values are specific to the myCloudPBX service type.
- Extension Number: myCloudPBX users configured extension number.
- Name: myCloudPBX users name.
- Outbound Phone Number: Outbound number configured for the extension.
- Has Voicemail: True: Voicemail is enabled. False: Voicemail is disabled.
- Enabled Calls: Comma separated list of call types enabled for the extension. Local, National, Mobile, International, International Other, Premium, Other.
- Date/Time: Date and Time of the request.
- Service UUID: Unique identifier of the service. A list of service UUIDs can be obtained using myCloudPBX API.
- Service Name: System configured name of the service.
- Service Friendly Name: User configured name of the service.
When you are finished, click 'Save & Close'.
# Service Integrations
Service Integrations include the following:
- Inbound Call Received: Webhook will fire when an inbound call is received.
- Inbound Call Answered: Webhook will fire when an inbound call is answered by a user.
- Outbound Call Placed: Webhook will fire when an outbound call is placed.
- IVR Call Received: Webhook will fire when a call reaches an IVR.
- IVR Option Selected: Webhook will fire after the caller has selected an option on an IVR.
# Enabling Service Integrations
From the PBX main page, click 'Manage Applications'.

Place a tick in the box to enable Applications.
# Service Integrations Configuration
From the PBX main page, click 'Integrations'.
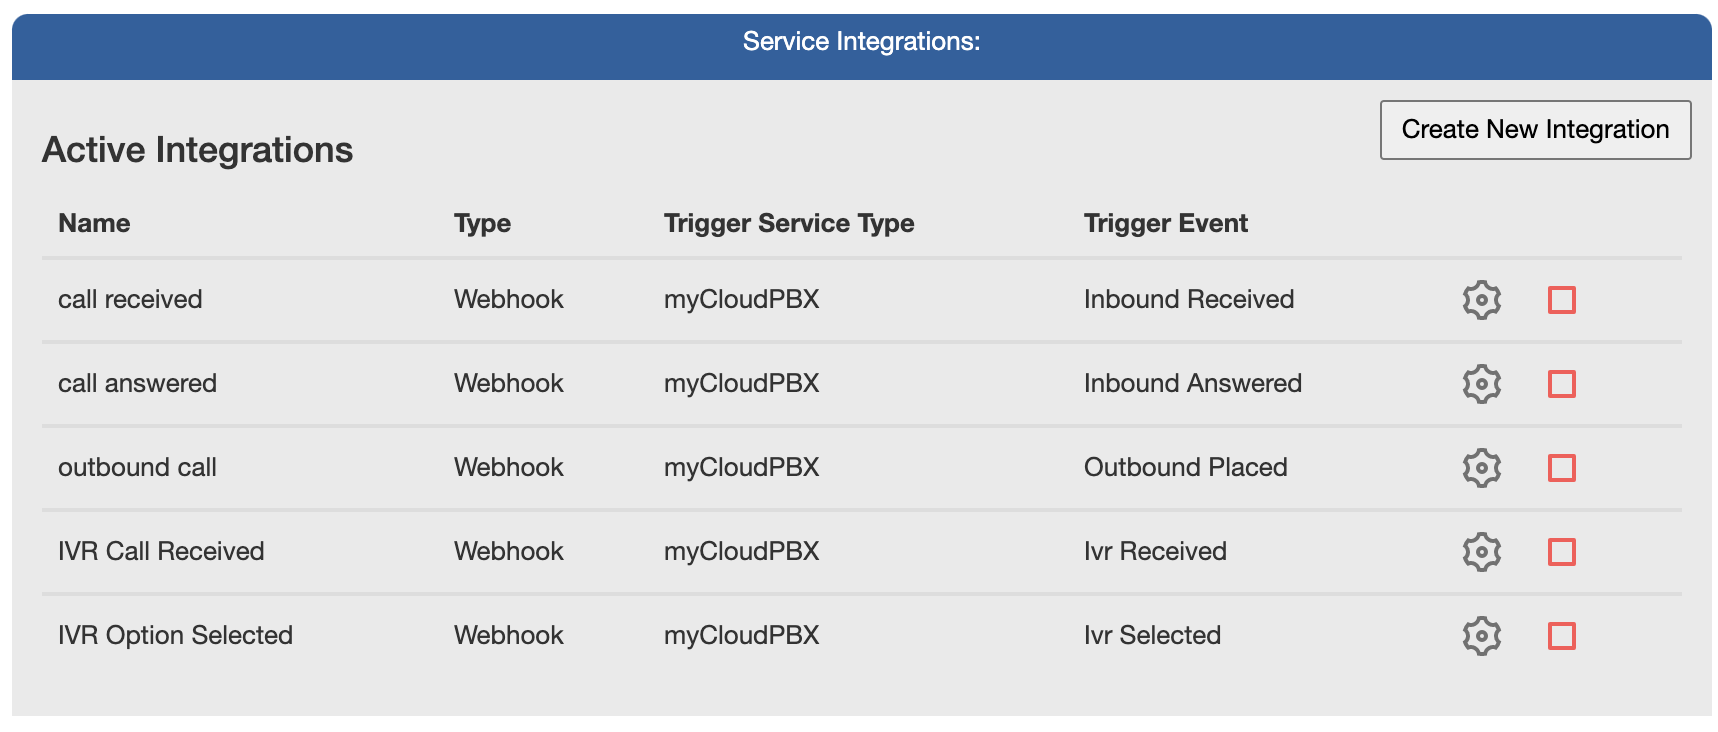
On this page, you can see all of your active integrations.
- Name: This name is for your reference.
- Type: This is the type of Integration, currently Webhook only.
- Trigger Service Type: This is the trigger, currently myCloudPBX only.
- Trigger Event: Inbound Call Answered, Outbound Call Placed, etc.
Click the icon to edit an Integration.
Click the icon to disable an Integration.
Click the icon to enable an Integration.
# Service Integration Configuration
To create a new Integration, click 'Create New Integration'.
Enter the following information:
- Integration Name: This is for your reference
- Type: Webhook
- Request URL: The URL the payload will be sent to.
- Method: POST | GET. Most endpoints will use POST. GET support for legacy applications.
- Format: JSON | QUERY. JSON payload or QUERY string.
- Path Arguments: Additional path arguments.
- Trigger Service Type: Service type.
Enter the following information:
- Authentication Type: None | Basic Auth | Token.
- Username: Username [optional]
- Password: Password [optional]
- Token: Token [optional]
A custom HTTP header can be added to requests, a typical request will start with X-, for example X-{myvalue}.
Enter the following information:
- Request Name: Name of the custom header value.
- Request Value: Value to be sent.
Field Values
The payload can be customized by selecting a predetermined value from the drop down list. In all cases the Request Key can be configured to align with your application. The following values are specific to the myCloudPBX service type.
- Extension Number: myCloudPBX users configured extension number.
- Name: myCloudPBX users name.
- Outbound Phone Number: Outbound number configured for the extension.
- Has Voicemail: True: Voicemail is enabled. False: Voicemail is disabled.
- Enabled Calls: Comma separated list of call types enabled for the extension. Local, National, Mobile, International, International Other, Premium, Other.
- Date/Time: Date and Time of the request.
- Service UUID: Unique identifier of the service. A list of service UUIDs can be obtained using myCloudPBX API.
- Service Name: System configured name of the service.
- Service Friendly Name: User configured name of the service.
- Source Number: Source phone number that placed the call.
- Destination Number: Destination phone number that was dialled.
- Call UUID: The Unique identifier of the call.
- IVR Name: The name of the IVR.
- Option Selected: The option selected by the caller at the IVR.
TIP
Note: Not all request values will be available for every trigger event.
TIP
Note: A call picked up via the ** Method will not be seen as an 'answered call' via the webhook as it is technically considered an outbound, internal call.
When you are finished, click 'Save & Close'.
# Sample Integrations
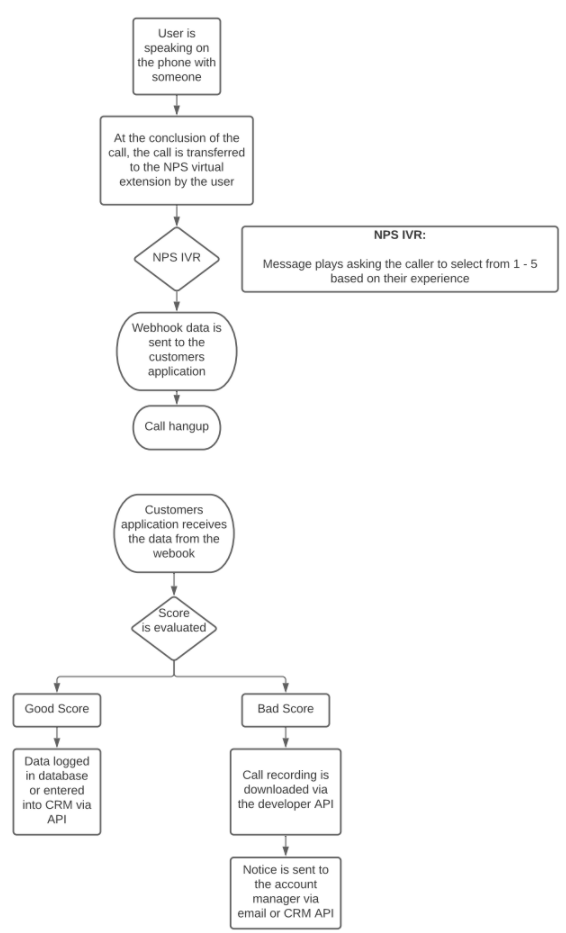
# Net Promoter Score (NPS)
A Net Promoter Score (NPS) Application is an example of something that can easily be create by making use of the 'IVR Selected' webhook trigger.
# Configuration
To create the required application you would need to do a few things.
Enable the 'IVR Selected' Webhook and configure the 'Request URL' to point to your webserver.
Create an IVR in myCloudPBX to capture the NPS score.
Create a virtual extension specifically for the newly created IVR.
Write a basic application to accept the webhook data on your webserver. Your application can then enter the data into your CRM (via API), or send an email to the appropriate person, based on the score received (option selected), with the following information.
IVR Name
Option Selected
Call UUID
Source Number
Destination Number
Date/Time You can then take appropriate actions from there.
TIP
Pro Tip: Use the preview API to download the call recording for the call based on the call UUID and upload it into your CRM or attach it to an email.
- When you want someone to leave a score, transfer the caller to the virtual extension.
# Call Flow